
I completed all of the jersey knit gauge swatch panels I want to do for the Valley Cotton 5/2, stitch sizes 5 to 8. At which point I realized that I had no T-pins for blocking them, and the severity of the curl was going to require pinning them. I also bought an ironing mat, since storing a full size ironing board in the apartment is kind of a pain.
Gauge Swatch, Stitch Size 8
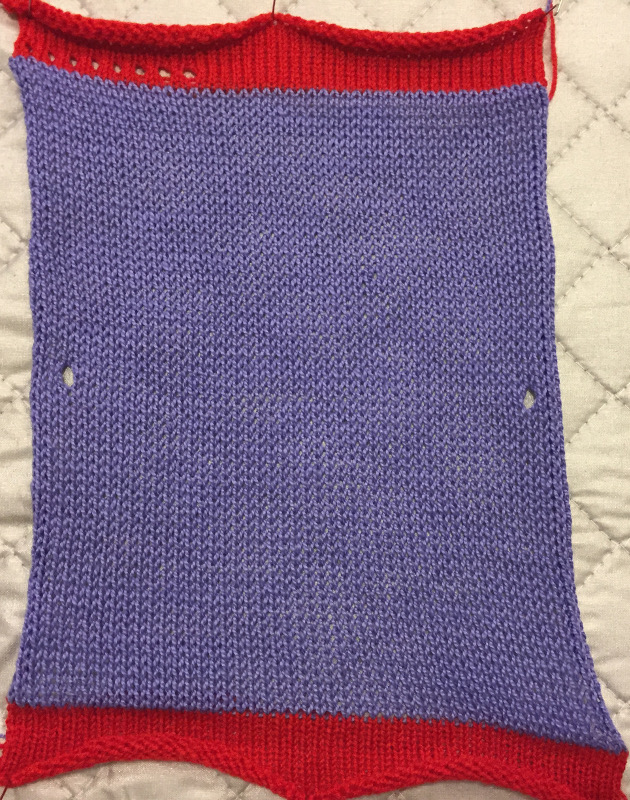
I pinned this back out after I was done steaming, ironing, pinning, and measuring all of the swatch panels, just so I could take a picture of it. As soon as I turned my attention away to write this up, one of the cats was camping out on it.
I quite like the hand of the fabric at this gauge (about 6.67 stitches and 7.164 rows per inch), though it might be a bit see-through for some. I’m definitely going to need to figure out something to make that uses this. A summery sweater, probably worn with a tank top under, would look very nice.
My blocking/pinning surface is our coffee table with a cork-topped yoga mat on it and the ironing mat. I bought foam floor mats from Home Depot at some point for doing this, but I have no idea where they are at the moment. The yoga mat isn’t really as thick as I’d like, but we’re not too concerned about the veneer on the coffee table staying scratch-free (thank you, kitties).
I’m still figuring out a useful/sensible way to include gauge swatch information on here, but here’s a chart with my results for now (40 stitches by 60 rows):
| Stitch Size | Width (in.) | Height (in.) |
|---|---|---|
| 8 | 6.000 | 8.375 |
| 7 ¾ | 5.875 | 8.000 |
| 7 ½ | 5.750 | 7.500 |
| 7 ¼ | 5.750 | 7.125 |
| 7 | 5.625 | 7.000 |
| 6 ¾ | 5.500 | 6.750 |
| 6 ½ | 5.375 | 6.500 |
| 6 ¼ | 5.250 | 6.250 |
| 6 | 5.250 | 5.875 |
| 5 ¾ | 5.250 | 5.375 |
| 5 ½ | 5.125 | 5.250 |
| 5 ¼ | 5.125 | 5.000 |
| 5 | 5.000 | 4.875 |
While I was waiting for the pins and ironing mat to arrive, I decided to attempt the sixth, and last, test piece in the Passap manual (see the two pictures below). It was an interesting piece to knit, lots of variety (obviously). Some of the pattern techniques really seemed to put stress on the machine, and I was concerned about damaging the needles or the locks or something.

Test Piece 6, front(?) side
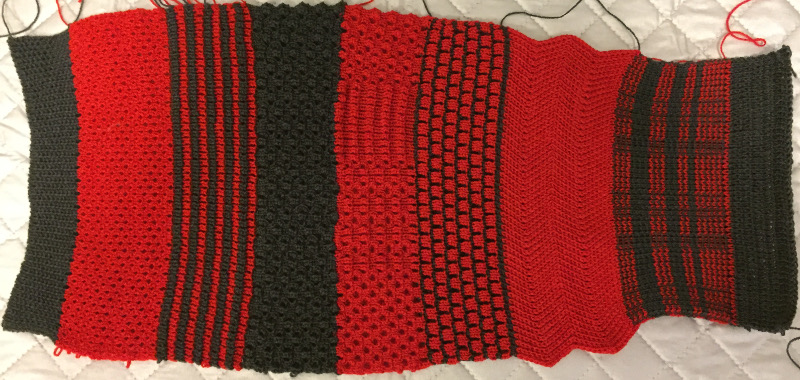
Test Piece 6, back(?) side
One of the things I find interesting about this test piece is that the “front” side of each section aren’t all on the same side. For example, the two sections on the right appear to be facing front in the upper picture. However, the section second to the left seems to be facing front in the lower picture (and the two right-most sections seem to be the back side).
The second section from left (red) is called a honeycomb pattern by the manual, and the fourth section from left (black) is called a double honeycomb pattern. I’m not really sure I see all that much of a relationship between the two in their outcome. The way the pushers are set up, the names make sense. The red section also looks like a honeycomb pattern. Maybe I just don’t know what a double honeycomb pattern is supposed to look like.
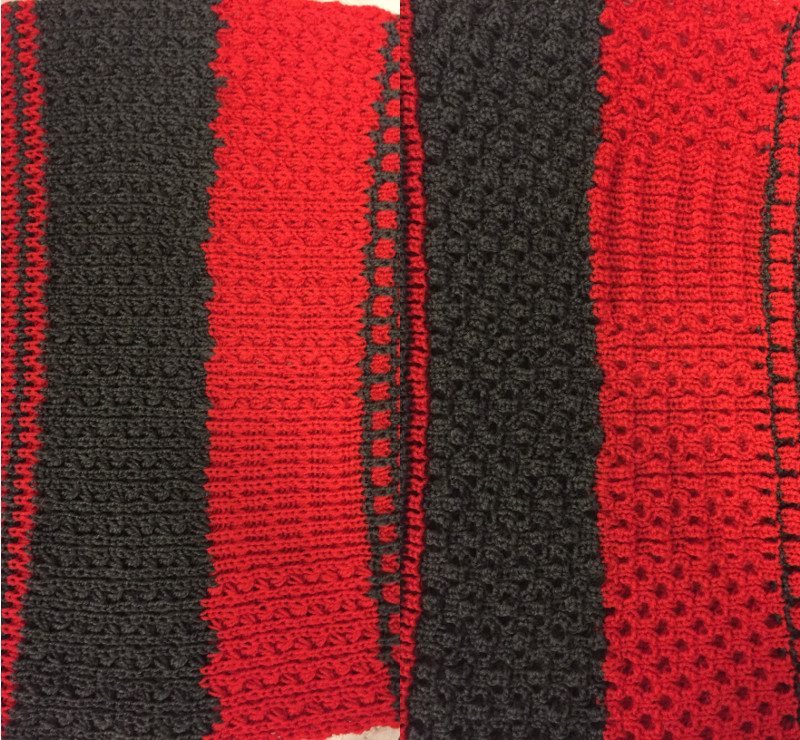
Test Piece Close Up
The solid black and solid red sections, fourth and fifth from left, I’m not entirely sure came out correctly. The bumps and stuff are just… really weird. To the left is a thumbnail of some close-up pictures of these sections, both “front” and “back.”